How to Install MOES Smart Thermostat
Using a smart thermostat is an effective strategy for energy usage management. At MOES, we’re excited to help you realize these significant benefits with our acclaimed smart thermostats.
If you have decent wiring skills, smart thermostat installation can be performed as a simple DIY project (even if you're not good at wiring, you can get help with our smart thermostat compatibility checker).

Prior to initiating the set-up process for your newly acquired smart thermostat device, it is vital that you confirm its compatibility with the pre-existing wiring and system structure in your home.
Numerous manufacturers offer accessible online tools or comprehensive checklists to corroborate this compatibility. It's always prudent to proceed on the side of caution rather than face regrets at a later point.
Once you've satisfactorily affirmed that the selected smart thermostat aligns with your existing domestic infrastructure, you may commence setup.
Despite having taken all possible precautions beforehand, should any complications arise during installation, don't hesitate to consult an electrical or HVAC professional.
Their expertise can alleviate unforeseen uncertainties and propose suitable courses of action leading towards achieving optimal results.
Before you start
Examination of System Type
Smart thermostats maintain a large compatibility range, working effectively with various heating and cooling systems, such as central or zone air conditioning. This offers significant versatility in usage.
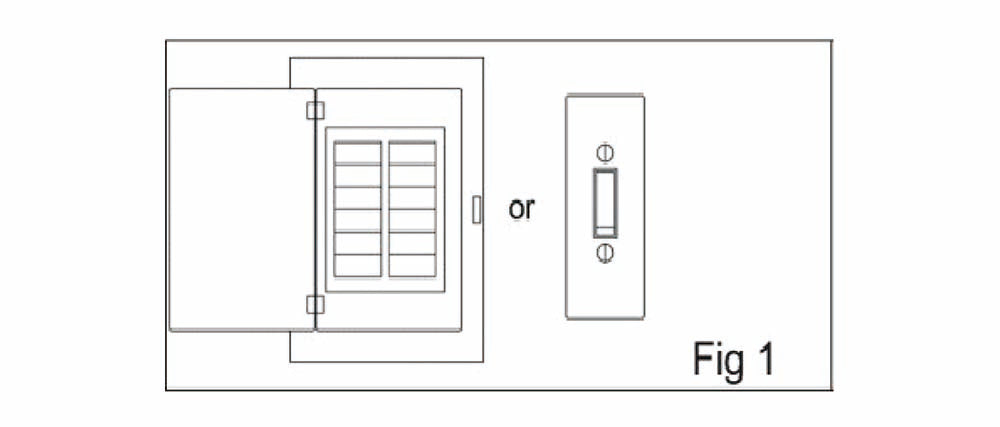
Start the process by turning off the power for both the HVAC system and the existing thermostat by accessing your circuit breaker panel. Following this procedure, remove the currently installed thermostat from its drywall anchors and decking to check on its internal wiring.
Evaluate Power Requirements
Confirm that the power requirements specified by the new advanced smart thermostat match the electrical topology of the femtocell node. Commonly used are "C" wire add-on governor triples or backup battery powered solution blocks.
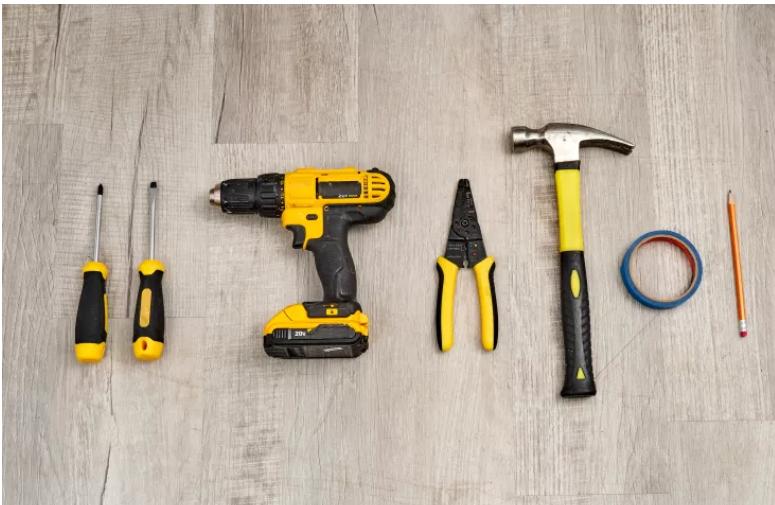
Essential Tools for Installation
The process of installing a smart thermostat may necessitate the inclusion of certain fundamental tools. The specific toolkit required can fluctuate, contingent upon both the environment in which the installation is taking place and also, the model of thermostat selected.
Frequently employed devices comprise:
- Screwdriver: This is commonly used to disassemble the pre-existing thermostat or attach the base platform if needs be.
- Electric Pliers: These are primarily utilized to facilitate secure wiring connections as well as trim any surplus wire length.
- Electrical Tape: A key tool for effectively insulating interconnection points on wires.
- Wire Pliers: Essential in removing insulation from wires prior to connection.
- Level Instrument: Ensures that your newly installed Smart Thermostat remains level at all times - vital for achieving precise readings.
- Drilling Equipment: If fresh mounting holes need introducing, it's likely you'll require both drilling machine and bits.
- Pen & Paper duo: Off-hand notation equipment serves well while recording wire configurations and other requisite information during installations.
Ancillary instruments or components such as wall screws or anchors might also come into play, depending largely on your distinctive set-up circumstances.
Select Your Optimal Positioning
We recommend carefully selecting an ideal location for installation. We suggest utilizing sections that offer shade, since they can maintain a safe distance from heat or cold emitting devices, such as grills—this is critical as the proximity of thermostats to these equipment-types could be problematic.
For best results, mount them approximately four to six feet above floor level, ensuring they are placed at a secure distance from areas often used by children or pets in order to prevent unintentional tampering.
Steps to Install a Smart Thermostat
Step 1. Deactivate the HVAC System
Before displacing your pre-existing thermostat, it is imperative to deactivate the entire HVAC arrangement via the circuit breaker panel for safety reasons. Please note that your system may be equipped with numerous circuit breakers.
By shutting off power supply through this method, you ensure protection against inadvertent short-circuiting of the system's electrical components during interface with the thermostat wiring.
Step 2. Dismantle the Existing Thermostat Panel
To facilitate the exposure of both the low voltage wiring and back panel, it is necessary to detach the faceplate from your current thermostat. This operation should be straightforward, with panels disconnecting smoothly.
Nevertheless, should you experience any resistance during this procedure, do refrain from exerting undue force. There may potentially exist undetected screws that require prior removal.
For subsequent reference, it's recommended that a photographic record of the existing wiring arrangement is made.
The majority of smart thermostats require an 18/5 construction wiring configuration for optimal operation. Its consists of five individual thin wires, each with a plastic coating and made from 18-gauge thermocouple-type material.
These wires might be encased together in a larger conduit or harness for ease of installation. Emerging from the wall cavity, they are provisionally arranged before finally being connected to their designated points on the reverse side of the thermostat unit itself.
Please pay particular attention to the wire typically colored either blue or black-known as "C" wire- which if implemented should connect directly to "C" terminal point on your device.
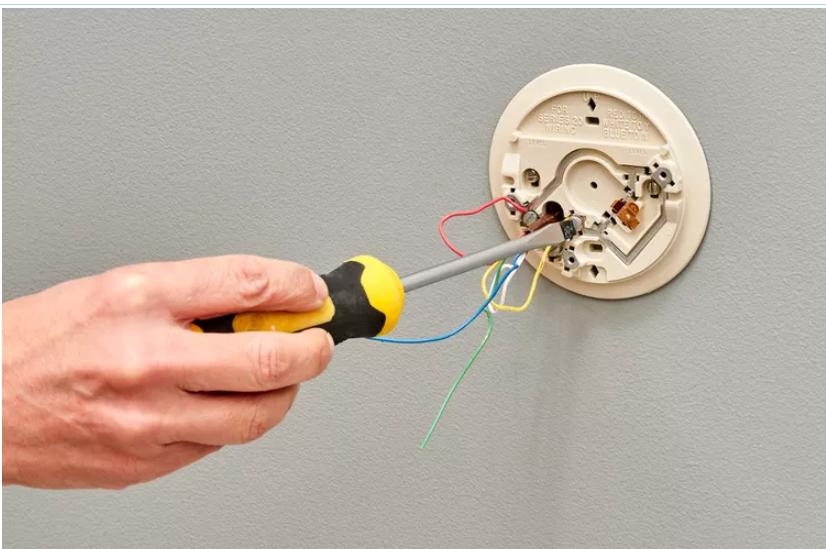
Before classifying any variables in the presently installed thermostat system, it is essential to detach all wiring connections situated at the back of this unit.
There may be instances where a "short loop" complexity involves the Rc, Rh or R terminals. It is of utmost importance that these prevalent circuits remain undisturbed under all conditions.
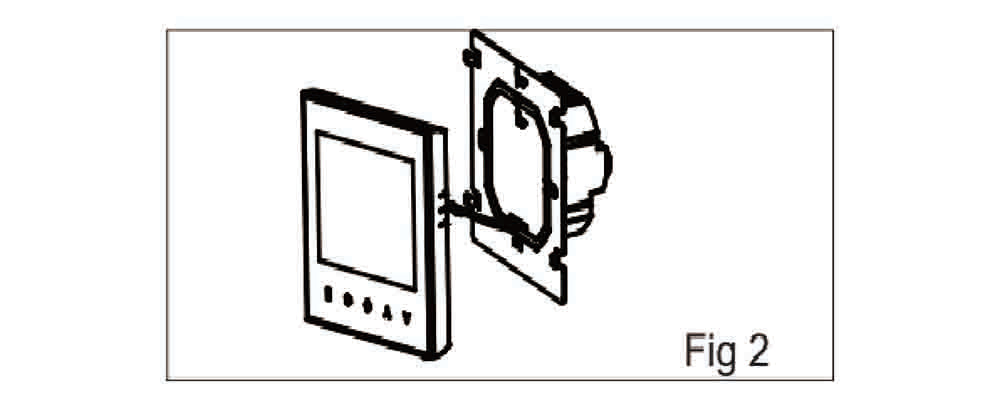
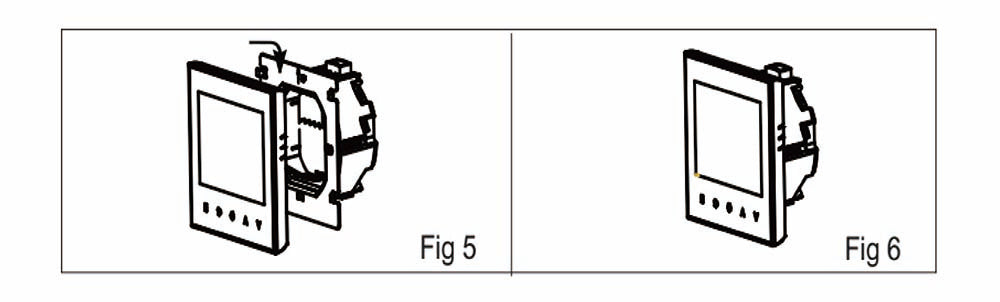
Step 3. Installation New Thermostat's Back Plate
You may use a drill or a Phillips screwdriver to meticulously remove the trim or back panel of your current thermostat from its wall placement. Fix the new back panel onto your wall, using drywall anchors if necessary for improved stability.
It is crucial that you perform accurate alignment of holes in both the trim board and drywall surface, as these will accommodate your thermostat wires.
Exercise caution when disassembling and loosening the neutral base of your thermostat to prevent any wires from moving back into their initial locations. If there are visible sections formerly occupied by screws, these can be discreetly covered with an additional coverage option.
For those who choose not to use such fitting options, place the rear against the wall, making sure to level it with the integrated level and then indicate with pencil marks on each side.
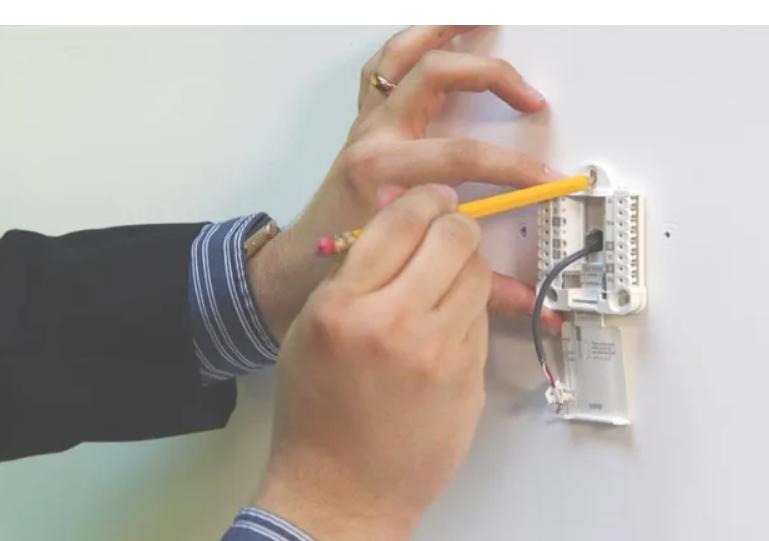
Step 4. Wire Reconnection
Once the backplate has been securely affixed, move forward with the reconnection of the thermostat wires to their respective terminals. The effective execution of this process can be significantly simplified through preliminary wire labelling via stickers.
In situations where these labels are absent, it's advised to consult the wiring schematic provided on the former back panel and meticuloulsy match each separate wire to its appropriate terminal.
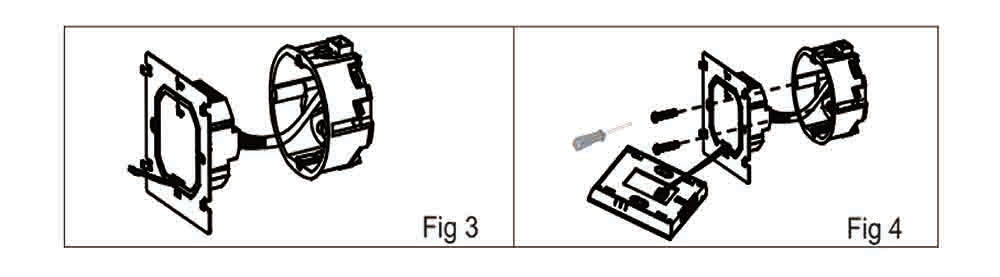
Step 5. Proceed with Thermostat Panel Installation
Having successfully positioned the wires, it's now time to affix the new thermostat’s faceplate onto its corresponding back panel. This is a process that demands precision and careful alignment. To secure it effectively, apply gentle pressure until you hear an audible click, indicating accurate placement.
If it is difficult to fix, do not use force. Wires may get in the way. Tuck them back into the wall and try to install the panel again.
Step 6. Initiating Circuit Breaker
The subsequent step involves reigniting power through your house's HVAC system via the circuit breaker switch which will reenergize your newly installed thermostat.
After initiating circuit breaker activation, anticipate operational functionality from your innovative thermostat device – a demonstration that all previous steps have been executed successfully.
Wi-Fi Connectivity
The functionality of a smart thermostat is dependent upon the provision of an active residential internet service, which should be Wi-Fi enabled. In addition to this, you must install the requisite application for your smart thermostat on your mobile phone.
Please note that in scenarios where there is a disruption in your home's Wi-Fi service, most smart thermostats are engineered to operate independently.
Nonetheless, during such periods of interruption, remote access and control from your phone may be temporarily unavailable until normal connectivity resumes.
Before you commence usage of your new Wi-Fi equipped thermostat for the initial time, it is crucial that you set up and configure the connection between your mobile device – whether smartphone or tablet - and the supplied Wi-Fi signal along with its settings. Failure to execute these steps effectively may impede communication between all connected devices.
Download your APP
For iOS devices, You can acquire the 'MOES' app directly from the Apple Store. To do this, utilize the search bar to look up 'MOES', then initiate download process. Alternatively, you have another option which involves scanning a specific QR code provided .
Regarding Android users: Please navigate to Google Play and input 'MOES' in its search functionality to locate our App. Once found, proceed with downloading it onto your device.

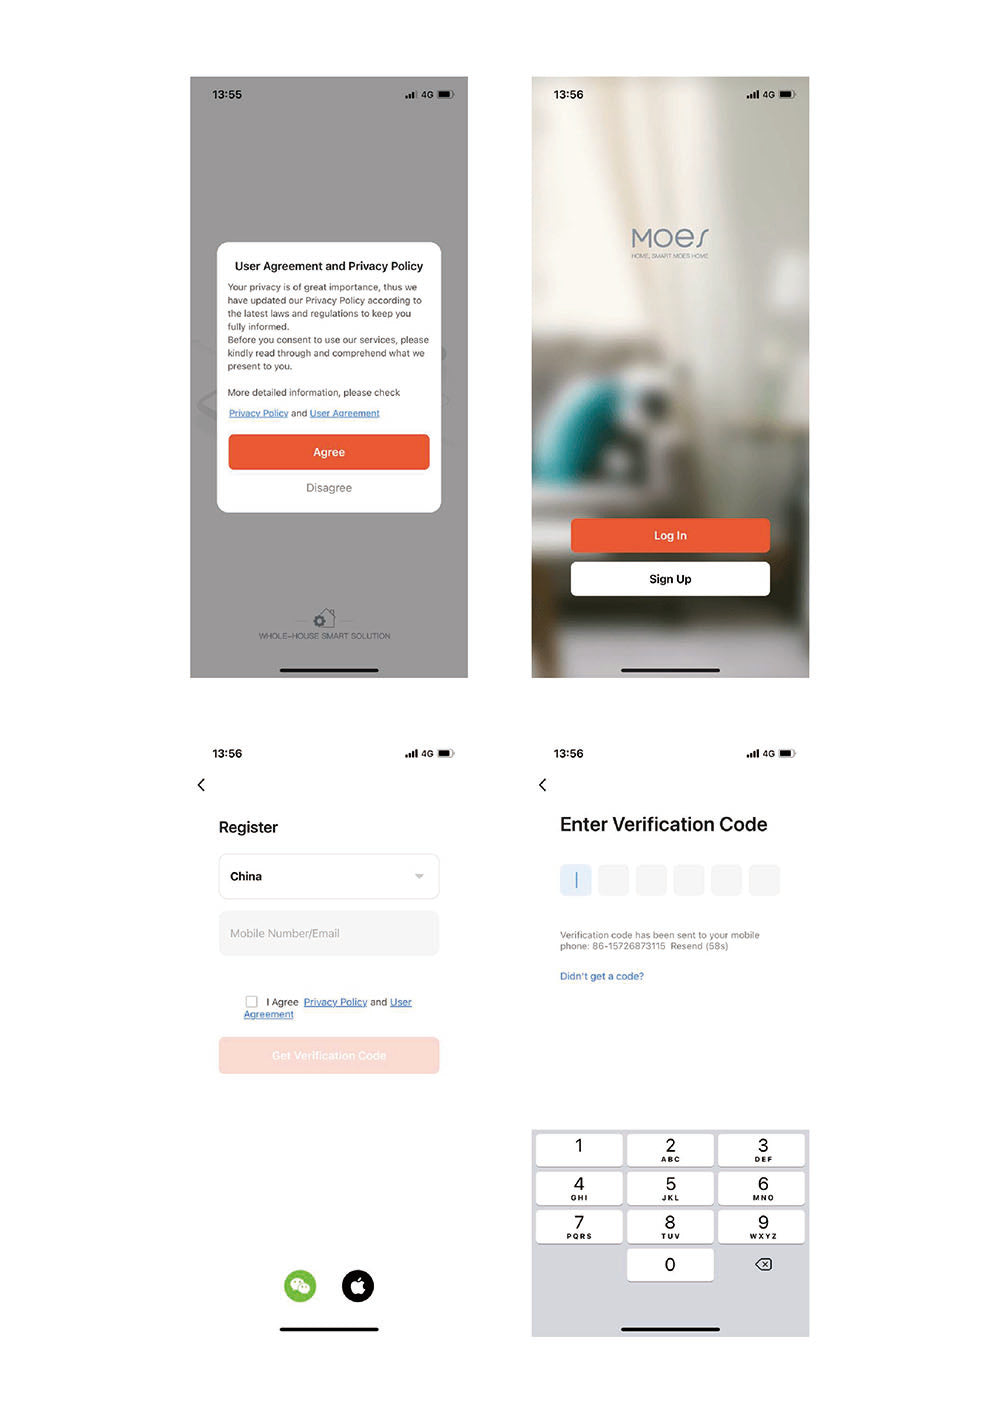
Account Registration
Upon launching your MOES application, a notification will be presented to you (refer Fig 2-1). Click 'Allow' to navigate to the registration page (refer Fig 2-2).
Press the 'Sign Up' button and input either your telephone number or email address (Fig 2-3) in order to receive a verification code. Following this, enter your desired password, confirm it for accuracy and security purposes (Fig 2-4) thereby finalizing account creation.
If you already own an account on MOES please proceed with the Login process instead.
Establish Your Thermostat's Wi-Fi Connection
1. Make sure your thermostat is switched off to begin with.
2. Initiate setup by pressing and holding the arrow button for approximately eight seconds.
3. Post initiation, you will notice that the backlight of your device is activated and an icon begins to flash at a rate of once per second.
Moving forward to app integration
4. Return to the main page (home screen) of your dedicated application.
5. You will find a '+' sign located in the top right corner of this page - press it; this action allows you to add your device into the system.
6. Upon viewing Figure 3-1 instructions: validate via clicking where mentioned as 'Confirm indicator rapidly blink'.
7. Select from available networks and subsequently return back to app operation for entering password details associated with selected wireless network router (view Figure 3-2).
8. As illustrated in Figure 3-3, post-password entry, hit 'confirm'. Your app should automatically initiate connection process which might range between five seconds up-to ninety seconds dependent upon multiple factors such as connectivity strength amongst others.)
9. Lastly after establishing successful connection review Fig 4–4's guide through which one could potentially rename room assignment concerning connected device if so desired.
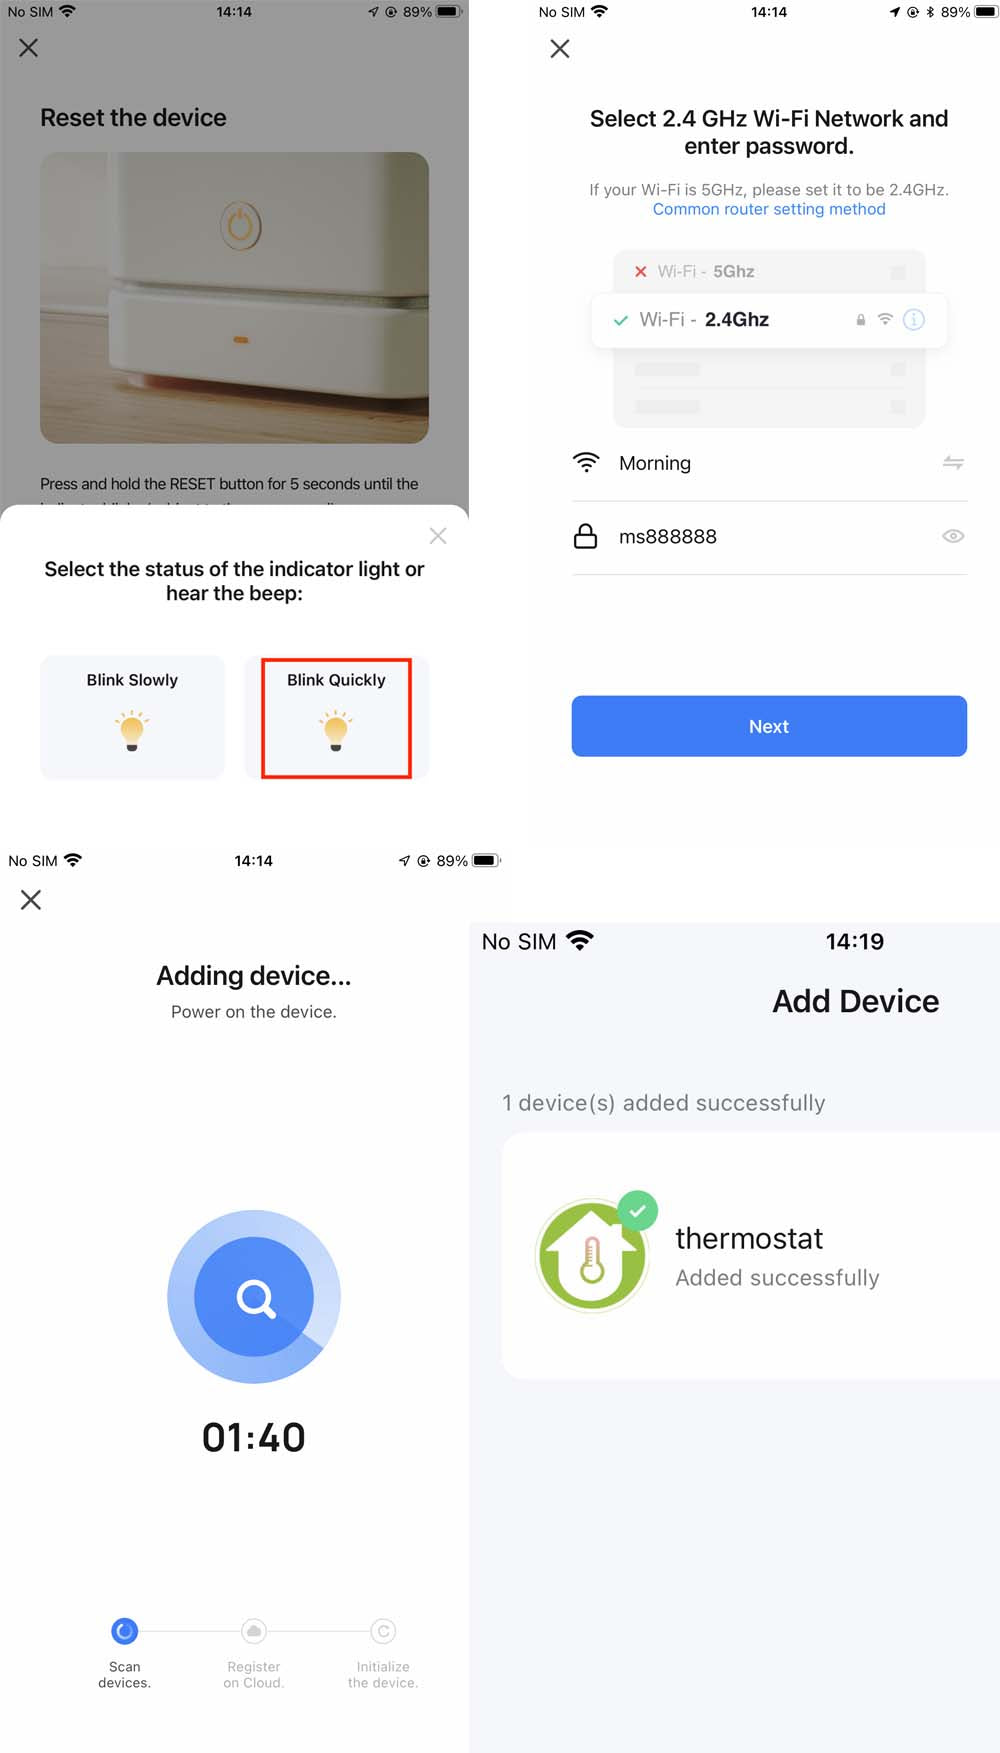
EZ Mode facilitates a rapid network connection between your application and device. Should you encounter issues such as unsupported router functionality, weakened WiFi signals or difficulty in enabling EZ mode, I recommend activating the AP Mode located at the top right corner of Fig 3-2. However, if your thermostat connection has been successful, please disregard the below AP settings.
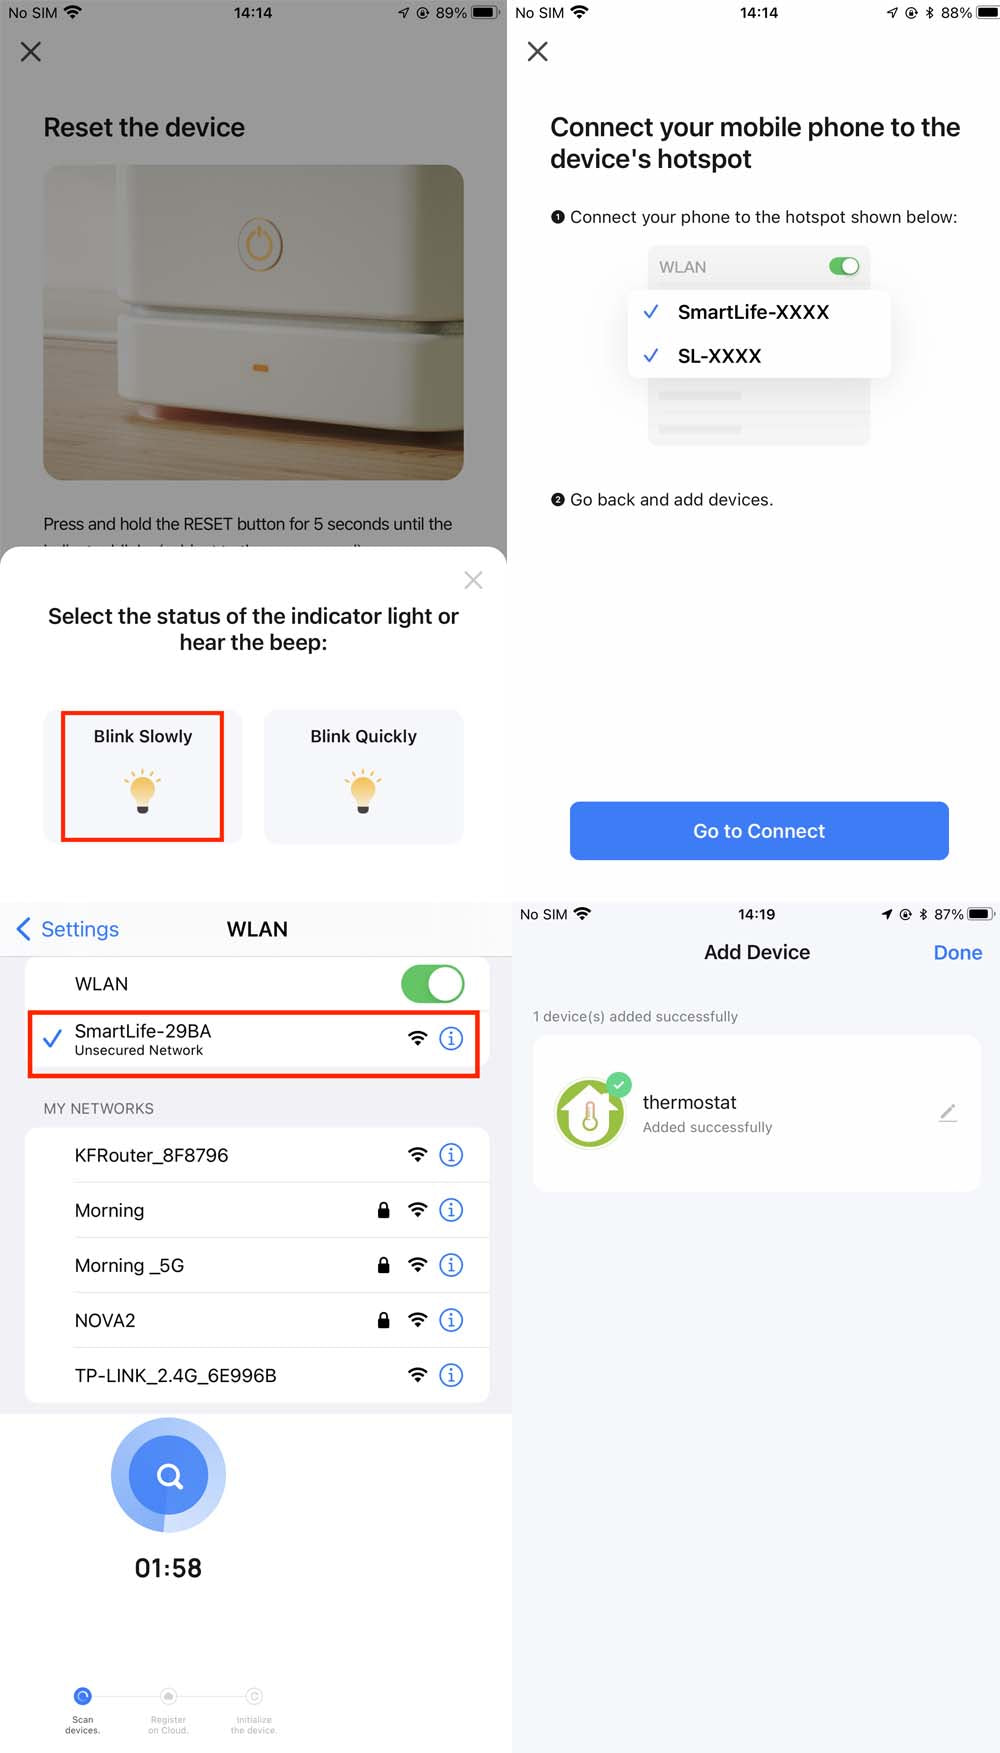
On your thermostat
- With power off, press and hold the arrow for eight (8) seconds.
- The backlight will be on and the icon will flash one time per sec.
- Press and hold the arrow for eight (8) seconds again.
- The icon will flash one time every (3) seconds.
- Then, go back to the home page of your app
- Click Confirm indicator slowly blink (Fig 4-1) then select your networkand back to your app to enter the password of your wireless router(Fig 3-3) and confirm. The app will go into the page in Fig 4-2.
- Press Connect now to select the wifi signal Smartlife-XxxX of yourthermostat (Fig 4-3).
- Go back to your app and click Connect now then the app will connectautomatically (Fig 3-4)
- This may typically take up to 5~90 seconds to complete.Your room name could be edited when the device is connected (fig 4-4)
Your connection has been successfully established, now start managing your smart thermostat.
MOES Advanced Smart Thermostat
In search of a next-generation smart thermostat? Look no further as we present ‘MOES’ repertoire of refined, sophisticated thermostatic solutions. Presented here are three top-tier selections from our popular and highly rated roster of smart thermostats.
For more alternatives that align with your specific requirements, peruse through our extensive array of offerings to further acquaint yourself with our diverse options.